Gingerbread House Assembly
Note:
- Pictures support one person putting it together. This icing is gold.
- Take the time to get the icing to the right stiffness and prep your bags before assembling.
- Give yourself room to work including space to rotate the base.
- 14 oz can or jar to use as a prop for the first step. The front and back of the house are almost a pound each so an empty cup will tip over.
- Placing the sides together. Don't press or squeeze together too hard. You want contact with icing and still have some icing in-between like a classic Oreo cookie layer. Mega stuff is too much icing in-between and the roof will have a large gap along the top.
- Humid environment (a pot of soup, broth or pasta cooking on the stove)? Assemble the house the day before you decorate. Or move it out of the kitchen if you're able to.

- First piece "the back" fit in between your first finger and use the rest to support from the bottom.

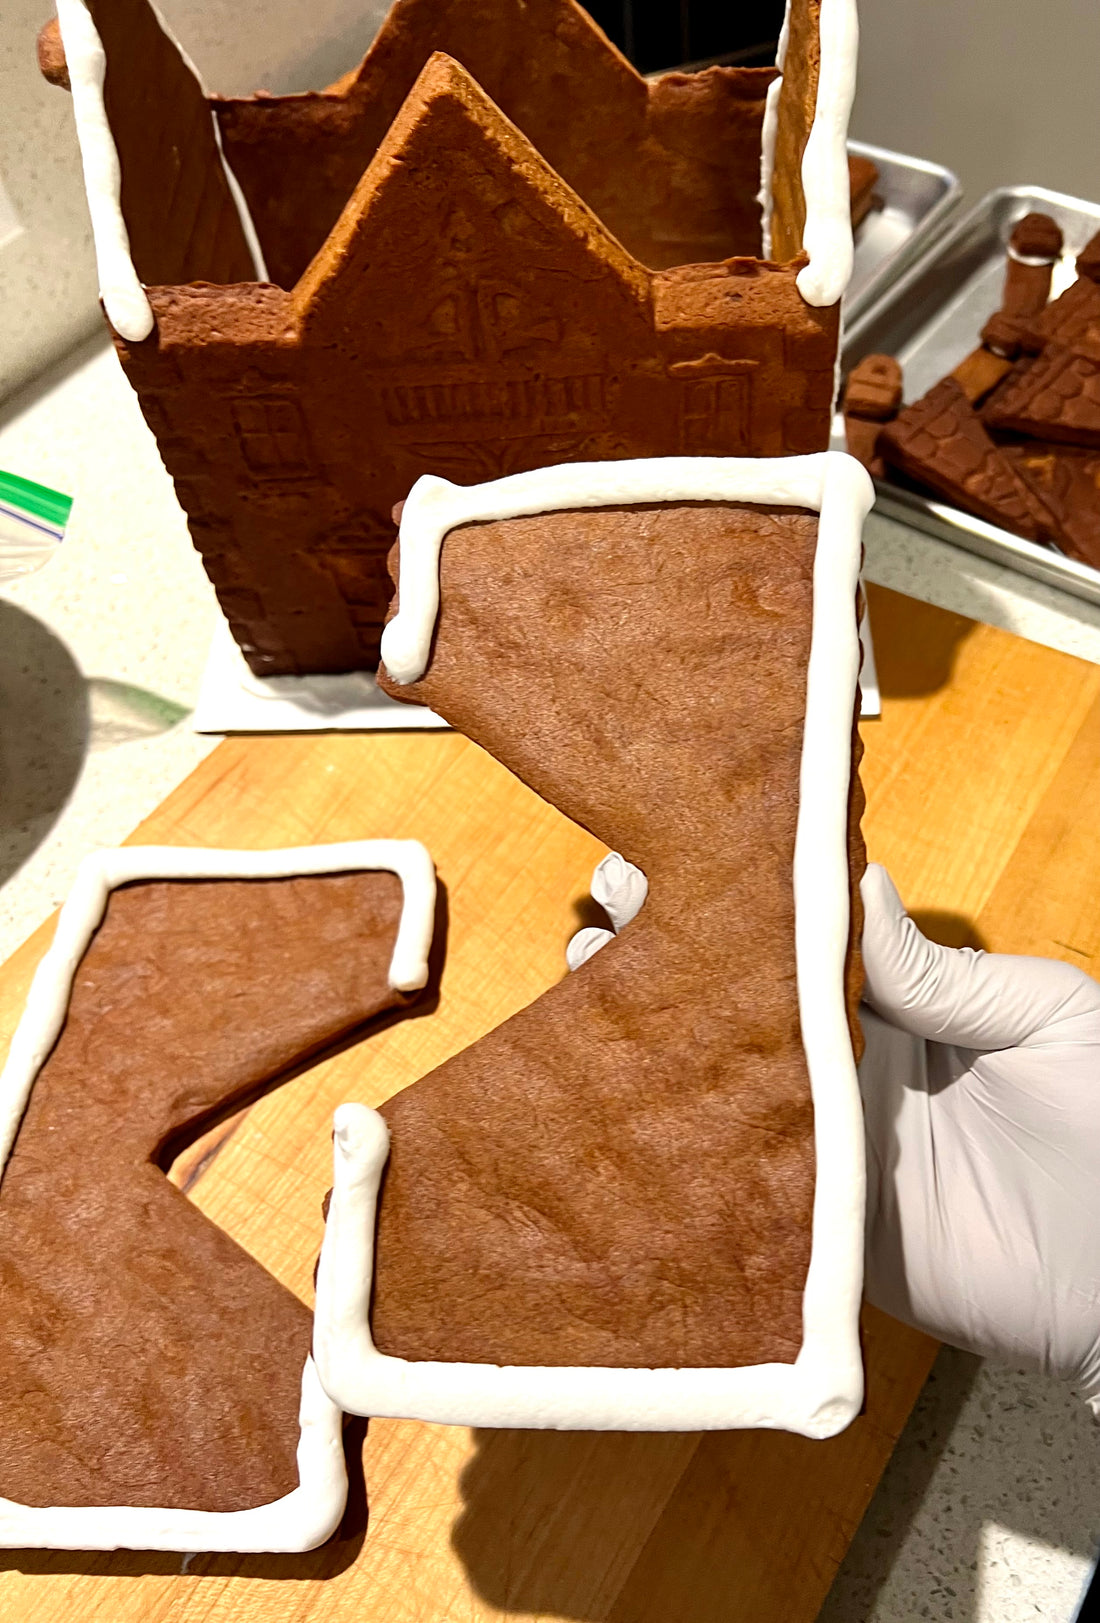
- Layer one of the sides on top between your first finger and thumb.

- The blue lines show where you are going to apply the icing. If this is too heavy or wobbly to hold, have your can/jar ready and do only one at a time. Use the jar to prop up the first side until the second side is placed.

- Iced and ready to join together on the base.

- Pick up the second side and ice the bottom. You're nestling the edges up against the back piece so the icing is in contact with the new side. It will stand up on it's own.

- Set it up against the other side of the back piece.

- Pick up the large front piece, add icing and set up against the two sides.


- Personal choice, but if you want a natural look leave the icing that squishes out. If you want a level space to add candy, take a knife and run it up the edge lightly taking off the overflow.
- Add a little icing to the chimney support (there is only one per house) and add to the chimney side of the house.


- Let the house sit for about 10 mins to set. If the pointed top of the end doesn't move when you gently push it, you are good to start adding the roof.

- Take the other two pieces of the chimney and "glue" together at the top. Set aside and let that set. This is the picture of the shorter piece. Place icing just here for now and then place on top of the back (hidden side) longer chimney piece. Let it set. This piece is placed on the side of the roof after that's set.

- Get the two roof pieces ready. Flip them over with the tops of the roof facing out.

- Run the icing along the border.

- Lift one roof piece and lay up against one side. Just set it gently.

- Lift the other roof piece on. Gently lift both sides up to the center to make the icing stick together. Don't press them. They are the easiest to break especially at the middle point.

- Adjust to level by looking at both the front and back.
- Chimney - Take the chimney that has set and place icing on the lower piece. Hook it up on the roof and hanging down on the chimney side above the support. They rarely touch. This is where I place a double stuff icing gap to make the chimney look like one piece.
- Now on to the eaves. The longest side of the eave is what goes up against the angled roof line.


- If you don't want gaps between the eave and the front or back of the house. Lay some icing outlining the point on both the front and back before moving on.

- Place a strip of icing across the top of one of the pieces to connect them when you place them onto the eave.

- You're done! Give the roof a few minutes to set before decorating.
